Dungeons Of Eternity: Difference between revisions
From Forsaken Planet
Protagosus (talk | contribs) No edit summary |
Protagosus (talk | contribs) |
||
| (27 intermediate revisions by the same user not shown) | |||
| Line 1: | Line 1: | ||
__NOTOC__ | |||
<div class="row"> | |||
<div class="col"> | |||
[[File:doetitle.png|link=Lore|400px]] | |||
</div> | |||
<div class="col"> | |||
<gallery mode="packed"> | <gallery mode="packed"> | ||
File:faq-icon.png|link=FAQs|[[FAQs]] | File:faq-icon.png|link=FAQs|[[FAQs]] | ||
File:new-player-guide-icon.png|link=New Players Guide|[[New Players Guide]] | File:new-player-guide-icon.png|link=New Players Guide|[[New Players Guide]] | ||
</gallery> | </gallery> | ||
</div> | |||
</div> | |||
== Hot Topics == | |||
<div class="card-deck"> | |||
<bootstrap_card header-image="[[File:EXO Suit.png]]" footer="[[EXO Perks]] are buffs to aid you in your mission on Planet Eternity."> | |||
<ul class="list-plain" style="margin: 0px; text-wrap-mode: nowrap;"> | |||
<li>[[Crystal Hunt|How to gain EXO Points]]</li> | |||
<li>[[EXO Suit]]</li> | |||
<li>[[EXO Perks]]</li> | |||
<li>[[EXO Points]]</li> | |||
</ul> | |||
</bootstrap_card> | |||
<bootstrap_card header-image="[[File:map-table-icon.png]]" footer="[[Missions]] are how players gain [[Level Mechanics|XP]] and [[Rewards System|Loot]] and skills"> | |||
<ul class="list-plain" style="margin: 0px; text-wrap-mode: nowrap;"> | |||
<li>[[Dungeon Raid]]</li> | |||
<li>[[Crystal Hunt]]</li> | |||
<li>[[Soul Harvest]]</li> | |||
<li>[[Sandbox Arena]]</li> | |||
<li>[[Difficulty Tiers]]</li> | |||
</ul> | |||
</bootstrap_card> | |||
<bootstrap_card header-image="[[File:weapon-features-icon.png]]" footer="[[Weapons]] can be enhanced by at most two [[Perks]] and one [[Weapons#Damage_Types|Element]]"> | |||
<ul class="list-plain" style="margin: 0px; text-wrap-mode: nowrap;"> | |||
<li>[[Weapons]]</li> | |||
<li>[[Weapons#Damage_Types|Weapons Elements]]</li> | |||
<li>[[Perks|Weapon Perks]]</li> | |||
<li>[[Status Effect]]</li> | |||
</ul> | |||
</bootstrap_card> | |||
<bootstrap_card header-image="[[File:charts-and-calculators-icon.png]]" footer="Charts and statistics and calculators"> | |||
<ul class="list-plain" style="margin: 0px; text-wrap-mode: nowrap;"> | |||
<li>[[Combat System#Enemy Damage Chart|Enemy Damage Chart]]</li> | |||
<li>[https://forsaken-planet.com/drop-rate-calculator Gear Drop Calculator]</li> | |||
<li>[https://forsaken-planet.com/simulator Combat Simulator]</li> | |||
<li>[https://forsaken-planet.com/drop-rate-sunburst Drop Rate Sunburst]<li> | |||
<li>[https://forsaken-planet.com/perk-drop-rate-radar Perk Drop Rate Radar]</li> | |||
</ul> | |||
</bootstrap_card> | |||
</div> | |||
== [[Enemies]] == | == [[Enemies]] == | ||
| Line 10: | Line 63: | ||
File:Bat-icon.png|link=Bat|[[Bat]] | File:Bat-icon.png|link=Bat|[[Bat]] | ||
File:Blob-icon.png|link=Blob|[[Blob]] | File:Blob-icon.png|link=Blob|[[Blob]] | ||
File:the-reapear-icon.png|link=Death Reaper|[[Death Reaper]] | |||
File:The-doomer-icon.png|link=The Doomer|[[The Doomer]] | File:The-doomer-icon.png|link=The Doomer|[[The Doomer]] | ||
File:Imp-kamakazi-icon.png|link=Imp Kamikaze|[[Imp Kamikaze]] | File:Imp-kamakazi-icon.png|link=Imp Kamikaze|[[Imp Kamikaze]] | ||
| Line 20: | Line 74: | ||
File:Octoculus-icon.png|link=Octoculus|[[Octoculus]] | File:Octoculus-icon.png|link=Octoculus|[[Octoculus]] | ||
File:Octoculus-boss-icon.png|link=Octoculus Boss|[[Octoculus Boss]] | File:Octoculus-boss-icon.png|link=Octoculus Boss|[[Octoculus Boss]] | ||
File:Scorpion-icon.png|link=Small | File:Scorpion-icon.png|link=Small Scorpion|[[Small Scorpion]] | ||
File:medium-scorpion-icon.png|link=Scorpion|[[Scorpion]] | File:medium-scorpion-icon.png|link=Scorpion|[[Scorpion]] | ||
File:scorpion-king-icon.png|link= | File:scorpion-king-icon.png|link=Scorpion King|[[Scorpion King]] | ||
File:Skeleton-boss-icon.png|link=Skeleton Boss|[[Skeleton Boss]] | File:Skeleton-boss-icon.png|link=Skeleton Boss|[[Skeleton Boss]] | ||
File:Skeleton-minion-icon.png|link=Skeleton Minion|[[Skeleton Minion]] | File:Skeleton-minion-icon.png|link=Skeleton Minion|[[Skeleton Minion]] | ||
| Line 28: | Line 82: | ||
File:Skeleton-warrior-icon.png|link=Skeleton Warrior|[[Skeleton Warrior]] | File:Skeleton-warrior-icon.png|link=Skeleton Warrior|[[Skeleton Warrior]] | ||
File:Small-spider-icon.png|link=Small Spider|[[Small Spider]] | File:Small-spider-icon.png|link=Small Spider|[[Small Spider]] | ||
File:Sorcerer-icon.png|link= | File:Sorcerer-icon.png|link=Skeleton Mage|[[Skeleton Mage]] | ||
File:Spider-icon.png|link=Spider|[[Spider]] | File:Spider-icon.png|link=Spider|[[Spider]] | ||
File:sewer-tentacle-icon.png|link=Sewer Tentacle|[[Sewer Tentacle]] | File:sewer-tentacle-icon.png|link=Sewer Tentacle|[[Sewer Tentacle]] | ||
| Line 60: | Line 114: | ||
</gallery> | </gallery> | ||
== [[Potions]] == | |||
<gallery mode="packed"> | |||
File:Large Health Poition.jpg|link=Large Health Potion|[[Large Health Potion]] | |||
File:Small Health Potion.jpg |link=Small Health Potion|[[Small Health Potion]] | |||
File:Bomb Potion.jpg |link=Bomb Potion|[[Bomb Potion]] | |||
File:Quad Damage Potion .jpg|link=Quad Damage Potion|[[Quad Damage Potion]] | |||
File:Haste Potion.jpg|link=Haste Potion|[[Haste Potion]] | |||
File:Ice Potion.jpg |link=Ice Potion|[[Ice Potion]] | |||
File:Resurection Potion.jpg|link=Resurrection Potion|[[Resurrection Potion]] | |||
File:Invisibility Potion.jpg|link=Invisibility Potion|[[Invisibility Potion]] | |||
</gallery> | |||
<div class="card-deck"> | <div class="card-deck"> | ||
| Line 76: | Line 143: | ||
<li>[[Status Effect]]</li> | <li>[[Status Effect]]</li> | ||
<li>[[Colorization]]</li> | <li>[[Colorization]]</li> | ||
</ul> | |||
</bootstrap_card> | |||
<bootstrap_card header="[[Items]], [[Consumables]] and [[Cosmetics]]"> | |||
<ul class="list-plain" style="margin: 0px"> | |||
<li>[[Items#Inventory_Items|Inventory Items]]</li> | |||
<li>[[Items#Non-Inventory_Pickups|Non-Inventory Pickups]]</li> | |||
<li>[[Items#Crafting_&_Skills|Crafting & Skills]]</li> | |||
<li>[[Items#Awards|Awards]]</li> | |||
<li>[[Potions]]</li> | |||
<li>[[Aztec Death Whistle]]</li> | |||
<li>[[Success Flair]]</li> | |||
<li>[[Trophies]]</li> | |||
</ul> | </ul> | ||
</bootstrap_card> | </bootstrap_card> | ||
| Line 109: | Line 191: | ||
<li>[[FAQs]] | <li>[[FAQs]] | ||
<li>[[Enemy Location]]</li> | <li>[[Enemy Location]]</li> | ||
<li>[[Dungeon Generation]]</li> | <li>[[Dungeon Generation]]</li> | ||
</ul> | </ul> | ||
</bootstrap_card> | </bootstrap_card> | ||
</div> | </div> | ||
== Maps, Missions and Elements == | |||
<div class=" | <div class="row"> | ||
<bootstrap_card header="[[ | <div class="col-md-4"> | ||
< | <bootstrap_card header="[[Realms]]"> | ||
<gallery mode="packed"> | |||
File:Underworld Realm Symbol.png|[[Underworld Realm]]: Cold and Dead... but only mostly DEAD! | |||
File:Sandstorm Realm Symbol.png|[[Sandstorm Realm]]: Desert lands with a dry hate. | |||
File:Vilehalls Realm Symbol.png|[[Vilehalls Realm]]: THICC with ICK | |||
</ | File:Lavaforge Realm Symbol.png|[[Lavaforge Realm]]: Hot as hell; yes, there is lava! | ||
</gallery> | |||
</bootstrap_card> | </bootstrap_card> | ||
</div> | |||
<div class="col-md-4"> | |||
<bootstrap_card header="[[ | <bootstrap_card header="[[Missions]]"> | ||
< | <gallery mode="packed"> | ||
File:mission raid dungeon map icon.jpeg|[[Dungeon Raid]]: loot and combat heavy mission | |||
File:mission soul harvest map icon.jpeg|[[Soul Harvest]]: gain points for crafting potions | |||
</ | File:mission crystal hunt map icon.jpeg|[[Crystal Hunt]]: gain EXO-suit points to assign for buffs | ||
File:mission sandbox map icon.jpg|[[Sandbox Arena]]: combat practice and PVP | |||
</gallery> | |||
</bootstrap_card> | </bootstrap_card> | ||
</div> | |||
<div class="col-md-4"> | |||
<bootstrap_card header="[[Enemy Elements]]"> | |||
<gallery mode="packed"> | |||
File:cc939f829761496ab2d0ba78da3f6c1b.jpg| no status effect applied | |||
File:7926D291-FC6C-48E8-9CEE-F4D89CB9AE2E_1_201_a.jpeg|[[Status_Effect#Poisoned|Poisoning]] stuns and causes damage for a few second | |||
File:C024777C-C543-4AFA-953D-B926707864FC_4_5005_c.jpeg|Some fire enemies explode for a lot of damage | |||
File:E0E0F5F2-0F54-4191-8C48-08E0FE787B55_4_5005_c.jpeg|[[Status_Effect#Iced|Icing]] for a few seconds and embrittles an enemy; next shot kills | |||
</gallery> | |||
</bootstrap_card> | |||
</div> | |||
</div> | </div> | ||
Latest revision as of 09:57, 19 June 2025
Hot Topics

Enemies
Weapons
Potions


Game Mechanics
Kiosks
Maps, Missions and Elements
-
 Underworld Realm: Cold and Dead... but only mostly DEAD!
 -
 Sandstorm Realm: Desert lands with a dry hate.
 -
 Vilehalls Realm: THICC with ICK
 -
 Lavaforge Realm: Hot as hell; yes, there is lava!


-
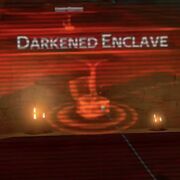 Dungeon Raid: loot and combat heavy mission
 -
 Soul Harvest: gain points for crafting potions
 -
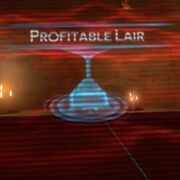 Crystal Hunt: gain EXO-suit points to assign for buffs
 -
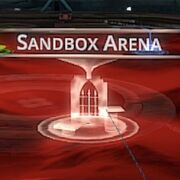 Sandbox Arena: combat practice and PVP


